To search for any recipe, use the search box at the top left of the page.


For any queries, emails welcome at julesdinnertable@yahoo.co.uk

laksa

laksa

Wednesday, 22 April 2015

Trinidad Roti and Channa Aloo with Coleslaw (V)

This is a terrific Vegetarian (Vegan but for the coleslaw) dish which is so comforting and so full of flavour that you don't miss having meat. It is a bit of a mix really. This is a dish that you would get in the Caribbean, but I have also made a Madras spice which would be from South India. In fact, a Madras typically in India would be Hindu and usually vegetarian. As always, you can easily buy Madras spice mix in the shops; for those who like curries as much as I do - its worth making it yourself. I have put the recipe at the end of this page.

The Channa (chickpea) and Aloo (potato) curry is simple to make and packed with flavour. The roti is a bread that is from India and is also eaten in Trinidad and Tobago and Guyana to name but a few. You can also buy roti fairly easily, but with only a few ingredients - its easier to make. I made this one as a low carb version with chickpea (gram) flour.

In this recipe I have made a slight Caribbean flavour - as it would be served in Trinidad - using scotch bonnet chillies and coleslaw side. Absolutely beautiful food.


For the Channa Aloo Curry

2 tbsp. madras curry powder
1 small onion, sliced thinly
3 cloves garlic, minced
1 scotch bonnet chilli, seeds removed and chopped finely
2 medium potatoes, peeled and cubed (about 1cm)
1 400g tin chickpeas, rinsed and drained
6-8 dried curry leaves
water
bunch coriander, chopped

Mix the 2 tablespoons of madras powder with 2 tablespoons of cold water. Mix into a paste. Heat 1 tbsp. oil and add the curry paste. Cook for 2 minutes until the water evaporates. Add the a further tbsp. of oil and the onion, garlic, chilli and chopped coriander (stalks only at this stage). Stir through and add 2 tbsp. water.

When the onions are brown and the liquid evaporated (about 4-5 minutes), add the chopped potato and the chick peas. Stir well and then add 2 cups of water, the curry leaves and season with salt and pepper. Bring to the boil and then turn to a medium heat, uncovered, to thicken. You want it to be fairly thick so you can stuff a roti and be able to cut it in half on a plate without the sauce running everywhere, but don't make it too dry. Leave it bubbling until thickened nicely. Finish with the chopped coriander leaves and stir through.

Lay a roti on a plate and fill the middle length with the curry. Roll up and cut in half. Serve with the coleslaw (recipe next).


For the coleslaw:

Shred 1/4 white cabbage and mix with 1 thickly grated carrot and 1/2 thinly sliced red onion. Whisk together 1 cup. mayonnaise, 2 tbsp. sour cream, 1 tsp. mustard powder, 1/4 tsp. celery salt, 1 tsp. sugar and 1 tsp. white wine vinegar. Pour over the vegetables and stir in well. Cover and chill until needed.

For the roti:   (makes 4)

1 cup chickpea (gram) flour
2 tbsp. all purpose flour
1 tsp. baking powder
1 tsp. ground turmeric
1/2 tsp. salt
approx. 1/2 cups water.

In a bowl, mix the flours, baking powder, turmeric and salt. Gradually add the water to make a pouring batter. Heat a frying pan with 1 tsp. oil and pour in about 1/4 batter, turning the pan to cover the whole base. After a minute or two when the batter begins to bubble, carefully use a spatula to turn the roti over. Cook the other side until golden and set to one side. Keep cooking the roti until all the batter is used. You should have four.


For the Madras Spice Mix

2 tbsp. coriander seeds
2 tbsp. cumin seeds
1 tsp. brown mustard seeds
1 tsp. fennel seeds

1 tbsp. ground cinnamon
2 tbsp. ground black pepper
1 tsp. whole cloves
2 tsp. ground turmeric
2 tsp. ground ginger
1 tbsp. cardamom pods, then seeded (discard shells)
1 tsp. cayenne pepper

In a dry frying pan, toast the first four ingredients until the popping of the mustard seeds begin to subside (be careful not to burn). Then put the toasted seeds into a hand blender and mix the remaining ingredients. Grind till you have a powder. Put into a sealed container until needed.


Parsnip Hummus

Being the end of the season for parsnips, I got two huge bags of parsnips very cheaply this week, so am finding ways of using them up. Am thinking of a parsnip soup maybe later in the week. But the weather was so lovely for the last few days that I decided to sit in the garden with some bread and my home-made Parsnip Hummus.

Its creamy and slightly sweet, with a tang of lemon and garlic and works well as a spread in a sandwich with some nice ham too!


Ingredients:

3 parsnips, peeled and cut into cubes
1 tsp. ground cumin
1/2 tsp. ground coriander
1-2 cloves garlic, crushed
1/4 tsp. salt
3 tbsp. tahini
juice of 1 lemon
1 tbsp. sour cream
4 tbsp. olive oil
grind of black pepper


Method:

 
Cook the parsnips in a small pan gently, with the cumin & coriander in just a dash of oil and a little water until parsnips soft and drain well. Put into a hand blender with the garlic, salt, tahini, lemon juice and sour cream. Blend until smooth. Now add the olive oil a tablespoon at a time, blending in between each tablespoon to get a thick, smooth consistency.
 
Season to taste and sprinkle with cayenne pepper and serve with flatbreads. Delicious and a great change from the usual hummus!


Tuesday, 21 April 2015

Ethiopian Spiced Chicken Meatballs with Linguine

The Ethiopian spice mix, Berbere, is so good that I decided to try it in a completely different dish. Inspired by a John Torode recipe where he uses Indian spices in meatballs (delicious) - I have tried it with my favourite spices. The recipe to make the Berbere Spice is at the bottom of this page.

Berbere is usually used in an Ethiopian curry I often make called Doro Wat (recipe earlier on this blog). Its unfortunately not found in many supermarkets but you can find it in spice shops or online. Either way - I make it myself, so have added the recipe. Its amazing and makes an awesome curry. Here I have used it to flavour the meatballs. Lovely.


Ingredients:

2 large chicken breasts, skin removed
1/4 cup Berbere spice mix
1 onion, chopped finely
1 clove garlic, chopped
2 tbsp. vegetable oil
100g white breadcrumbs
50ml milk
200ml cream
1 tsp. lime pickle
200g linguine
chives for garnish

Method:

Fry the onion, garlic and spices in 1 tablespoon of oil on a low/medium heat until onion cooked and spices fragrant. Put into a bowl to cool. Mix the breadcrumbs with the milk and add to the onions. Using a hand blender, blitz the chicken breasts until well chopped and mix in with the spiced onion mix. Combine well and make into small 1 inch meatballs.

Boil the linguine in a large pot of boiling water until cooked. Heat the second tablespoon of oil and fry the meatballs on all sides until browned and lower the heat. Add the cream and stir well. Add the lime pickle and season with a little pepper.

Serve the meatballs on the pasta and garnish with snipped chives. Enjoy!


Berbere Spice Mix

I think its always good to have a great selection of herbs and spices in the store cupboard. I ensure I always have the list of ingredients for Berbere Spice Mix as its so hard to buy and so easy to make. And it stores well in a dry cupboard.

2 tsp. coriander seeds
1 tsp. cumin seeds
1/2 tsp. fenugreek seeds
Seeds of 4 cardamom pods
4 cloves
4 dried red chillies, broken into pieces

3 tbsp. paprika
1 tsp. ground all spice
1/2 tsp. salt
1/4 tsp. nutmeg
1/2 tsp. ground ginger
1/4 tsp. cinnamon
1 tsp. turmeric
Method:

With a dry hot frying pan, toast the seeds - down to and including the cloves and chillies. Shake the pan and ensure it doesn't burn. Tip into a bowl to cool a little. Now using either a hand mixer or a pestle and mortar, blend (or crush) until ground. Add the rest of the spices and stir together. You have your spice mix!


This recipe makes about 1/2 cup. You can use 1/4 cup in this recipe and make a curry with the rest another night! Enjoy!

Monday, 20 April 2015

Home-made Peppercorn Sauce for Steak

Having two delicious looking fillet steaks to cook for dinner last night, my mind was in a whirl with different way to cook it. And after much consideration I decided that myself, like most people, just like a steak to be a steak. Pan fried, medium rare, with chips, peas and a perfect sauce on the side.

Peppercorn sauce has long been my favourite and I have tasted many types (from the sublime to the ridiculous!). This is the one we make at our house.


Ingredients:

1/2 onion, finely chopped
2 tbsp. whole black peppercorns
1 tsp. oil
25ml sherry (we used sweet, but you can use dry if liked)
75ml brandy
25ml beef stock (cube is fine)
large pinch ground black pepper
50ml double (heavy) cream


In a small bowl, mix the brandy and sherry together. Sweat the onions and the peppercorns on a low heat for ten minutes until onions cooked and peppercorns slightly softened. Pour half of the brandy/sherry mix into the pan and put the other half in a ladle, which has been warmed over the flame. Set light to the ladle full of alcohol and add to the pan to flambé. Be careful! When the flames subside, add the stock and ground pepper. Stir well.

On a medium heat simmer to reduce by half and then add the cream. Stir through. If making steaks at the same time, the steaks should be resting in foil beside you. I tend to pour the resting juices from the meat into the sauce, which ties the flavours in beautifully.

Serve the steak with the sauce on the side. Delicious!


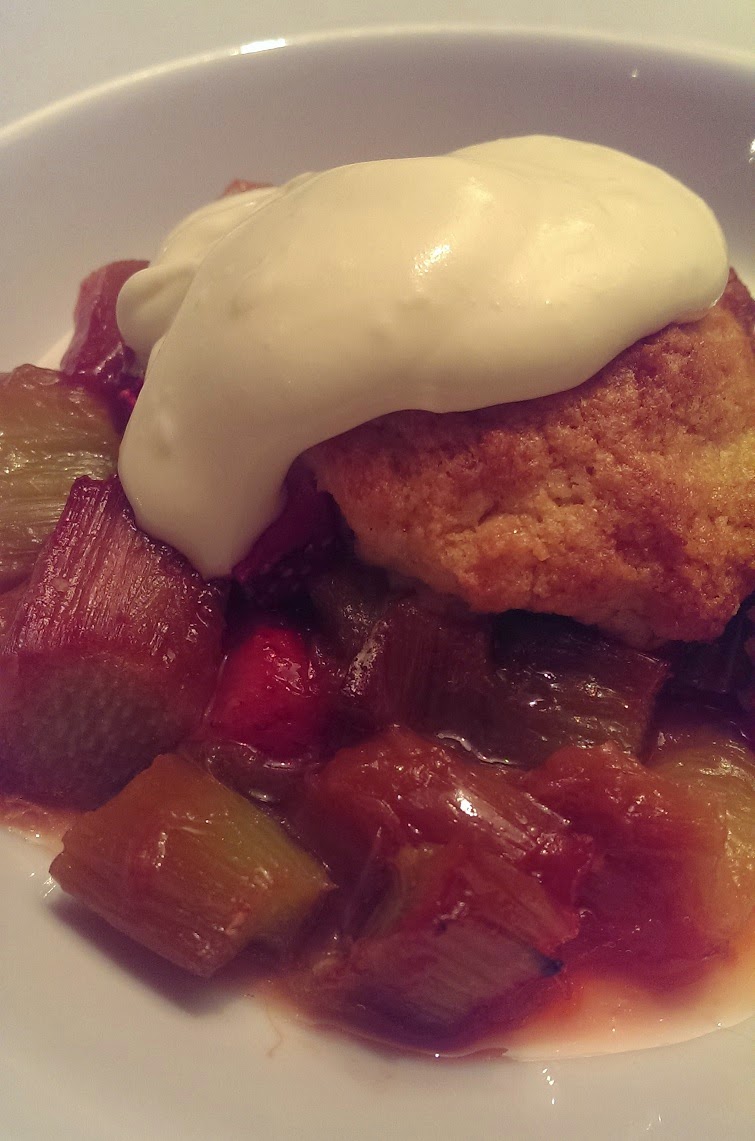
Rhubarb & Strawberry Cobbler

We've been growing rhubarb in our garden for about 4 or 5 years and I have to say, it is the easiest thing to grow! It starts growing in April and keeps giving right up until the end of September. Then it sits quietly in the soil waiting for spring. I currently have rather a lot so I decided to make a dessert last night to go with some strawberries that I had in the fridge looking a bit over ripe.

This sweet cobbler I usually make with blueberries; this was SUCH a refreshing change. A cobbler is from the United States and England and can be either sweet or savoury - I like both. Here I have made my Rhubarb and Strawberry Cobbler.


Ingredients:

500g rhubarb, chopped into inch pieces
small punnet strawberries, quartered
140g sugar, plus 40g
200g plain flour
2 tsp. baking powder
85g butter, cubed
200ml double cream

Method:

Set the oven to 190 C. Put the rhubarb into a saucepan with 140g sugar and a tiny splash of water. Cook for about 5 minutes, so the rhubarb cooks a little, but holds its shape. Drain and put into a 9 inch pie dish. Mix in the strawberries. 

In a bowl, mix the flour, baking powder and 40g sugar. Rub the butter into the flour mix until it looks like large breadcrumbs. Stir in the cream - it should look like a loose, shaggy dough. Spoon small mounds of the dough, scone sized over the fruit. Don't cover all of the fruit as you want them to bubble up between the cobbler. Bake for 30 minutes until bubbling and golden and serve with softly whipped cream.


This dish is also delicious served cold with ice cream. Its a summery delight!

Sunday, 19 April 2015

Spanish Pork with Pea Puree & Pea Shoots

I think the first time I heard about pork cheeks was relatively recently, possibly only in the last couple of years. Chances are, it was on a cookery show like Masterchef and I assumed that they were an expensive cut of meat. It seems I was wrong. A pack of four cheeks (a meal for two) costs £2.50. Put that together with the vegetables, you could actually serve this as an impressive main course for a dinner party of four for under £10. I think that's pretty good! Not only is it a cheap dinner party meal, but it can all be pre cooked and ready to serve, so you aren't stressing to get things ready when guests are having their first drinks. Perfect!

Here I have cooked them slowly in a sherry based sauce and they were melt in the mouth delicious.


I had the potatoes cooked and mashed, ready to be re-heated, the pea puree cooked, pureed and ready to be re-heated. And the slow cooked meat can be taken out of the casserole, the sauce blended, put into a small pan and the meat popped in the sauce, also to be reheated. All you have to do is plate up and serve to delighted and hungry guests.

Ingredients:     (Serves 4)

8 pork cheeks
flour, for dusting
1 tbsp. olive oil
10 shallots, peeled and halved
1 carrot, chopped
1 small red pepper, chopped
2 cloves garlic
200ml sweet sherry
500ml beef stock (cube is fine)
1/2 tsp. dried thyme
2 bay leaves
1 tbsp. honey
1 apple, chopped

For the pea puree:
2 cups frozen garden peas
2 tbsp. olive oil
juice of half a lemon
salt & pepper

Method:

Dust the pork cheeks with flour and heat the oil in a flame proof casserole dish. Seal the meat on all sides to brown and remove from the pan. Set to one side. Add the shallots, carrot, red pepper and garlic to the same pan (add a tiny bit more oil if needed) and cook for 10 minutes until beginning to brown. Add the sherry to the vegetables and turn up to high to reduce by 50%.

Add the meat back to the pan along with the beef stock, honey, thyme, apple and bay leaves. Stir and put into a low oven at about 170 C for 2 hours, checking occasionally to turn over the meat .

To serve, take the meat out of the sauce and pour the sauce into a hand bender. Blend until smooth and put into a small pan on a low heat. Pop the meat in to keep warm while you make the pea puree.

For the pea puree:
Boil the peas for 3 minutes until cooked. Drain well and put into a hand blender with the olive oil, lemon juice and generous seasoning of salt & pepper. Blitz until smooth.

I served the pork on a bed of mashed potatoes with the pea puree and some pea shoots. Delicious!


No Comment?

To all readers who have told me they can't seem to comment on the recipes - apologies. I am looking into this and hopefully will be sorted soon.

Please note, if you have any comments or queries, please email to julesdinnertable@yahoo.co.uk

Happy Cooking!

Jules

Saturday, 18 April 2015

Chicken Chow Mein (Step-by-step guide)

This is a recipe with a step by step guide on how to make an authentic delicious homemade Chicken Chow Mein. The word means 'fried noodles', chow meaning 'fried', mein meaning 'noodles' and is a Chinese dish popular throughout Britain, the United States and India.

It really is very simple to make as it takes about 5 minutes to cook - its all about the preparation. There are six easy steps to the preparation for this dish, which takes no more than 15 minutes and one you have them all ready, you're good to go whenever you are hungry.


Ingredients:    (Serves 2 large portions)

2 medium chicken breasts, skin removed
1 tbsp. sake (Chinese rice wine)
3 tbsp. soy sauce
1 tsp. cornflour (corn-starch)
1/4 cup (60ml) chicken stock (use 1/2 stock cube)
1 tbsp. hoisin sauce
large pinch of pepper
2 spring onions (scallions)
1 small carrot
1/2 green pepper
100g mange tout
handful cooked small prawns
1/2 onion
2 cloves garlic
1 red chilli
inch piece garlic
120g medium egg noodles

Step 1:
In a small container put the 1 tablespoon of Sake, 1 tablespoon of soy sauce, the teaspoon of cornflower and whisk together. Slice the chicken and add to the marinade. Sir together. This is the chicken and marinade. Set to one side

Step 2:
In a separate container mix the chicken stock, the remaining 2 tablespoons of soy sauce, the hoisin sauce, pepper and stir together. This is the sauce for the dish. Set to one side

Step 3:
Slice the spring onions. Put the green part into a bowl. This is the garnish. Set to one side.

Step 4:
Put the white parts of the spring onion in a container and then slice the carrot, mange tout, onion and green pepper and add to the white part of the spring onion. Set the veg to one side.

Step 5:
Finely slice the garlic, chilli and ginger. Put in a separate bowl.

Step 6:
Cook the noodles in boiling water for 2 minutes and drain. Refresh in a colander under cold water to stop the cooking process and put in a bowl with a teaspoon of oil to stop them sticking.

You will now have six containers. The chicken marinating, the sauce prepared, the noodles cooked and the vegetables separated (below).

Garlic mix, Veg mix and Garnish
I love preparing all this and then getting on with something else in the knowledge that I can have a fantastic meal when I want that will be such a pleasure to cook as it takes five minutes!

Okay so now lets cook. In a wok or large pan, heat a tablespoon of vegetable oil (peanut oil is more authentic if you have it). Add the garlic, ginger and chilli and sizzle for 10 seconds. Add the chicken and its marinade and stir fry for 2 minutes. Add the container of vegetables and cook, stirring in the hot oil for a further 2 minutes. Remove the veg and chicken from the pan and put into a bowl.

Heat another tablespoon of oil in the same pan and add the noodles. Stir fry for 2 minutes and then push them to the sides of the pan leaving a space in the middle. Pour in the prepared sauce and mix in. Then put the chicken and vegetables back in the pan and stir all together. Add the cooked prawns to heat through for a minute. That's it!  Serve on a large plate topped with the green onion garnish and eat!


Note: The Sake wine is easy to buy in most stores nowadays and although you don't use much, it lasts for ages. Keep it to one side and you will find you get through it if you like dishes like this. Alternatively you can drink it the way it is meant to be drunk. Put the bottle in a bowl of hot water to heat up and drink it hot. Delicious!

Friday, 17 April 2015

Perfectly Comforting Lasagne

I am only calling this perfect because I have cooked lasagne so, so many times with varying ingredients and this particular one was my favourite. I think its partly the half pork mince and half beef mince that makes it taste so much better, and also the use of just parmesan cheese. The pork mince is almost sweet and adds a lovely edge to the beef. I have used dried pasta sheets (cheap ones at that) and it tasted no different to when I make my own pasta. And I didn't put cheese all the way through it but just added parmesan to the bĂ©chamel sauce and topped with a bit more. Simple and perfect.


Ingredients for bolognaise:

250g lean pork mince
250g lean beef mince
4 rashers streaky bacon, chopped
1 large white onion, chopped
2 cloves garlic, thinly sliced
1 small (or 1/2 large) carrot, chopped
200g button mushrooms, sliced
1/2 tsp. dried thyme
1/2 tsp. dried oregano
1/2 tsp. dried basil
400g tin chopped tomatoes
glass of red wine (or white if preferred)
100ml boiling water
1 beef stock cube

For béchamel sauce & lasagne:

35g butter
50g plain flour
600ml milk
60g parmesan cheese, fine grated (or use Grana Padano - is much cheaper and tastes the same) 
200g dried lasagne sheets (about 10 sheets)

Method:

Dry fry the meats in a large pan. If you use lean mince there should still be enough fat in that and the bacon to not need oil. (Try to avoid the fatty mince which usually has too much water in it too, making the meat 'stew' which is unpleasant). Add a teaspoon of oil if you find it sticking. 

Add the carrots and garlic and continue to stir until meats cooked through and beginning to brown. Add the mushrooms and herbs. Crumble the stock cube over the mixture and stir in. Add the chopped tomatoes, wine and water and turn up heat to cook off the alcohol. Stir well and turn the heat to a simmer. Leave to cook, uncovered for about 45 minutes to an hour , stirring occasionally, for flavours to develop and the sauce to thicken.

To make the white sauce, melt the butter in a medium pan. When melted, add the flour in one go and stir well to incorporate. Cook for 1 minute and then add the milk, a little at a time. Keep adding milk and stirring to get a smooth sauce the consistence of double cream. Don't make it too thick as you will need to pour it on the pasta. Add half of the grated parmesan and stir through.

To assemble use a 9 inch square lasagne dish and put 1/3 of the bolognaise in the bottom. Add a layer of dried pasta sheets, then 1/3 of white sauce. Repeat ending with white sauce and sprinkle over the remaining parmesan. Cover with lightly oiled kitchen foil and pop in the oven, set at 200 C for 20 minutes. Remove the foil and return to the oven for a further 20-25 minutes.

Serve with salad and a buttered baked potato if liked. Or garlic bread. All good!!


Thursday, 16 April 2015

Lemon Meringue Cupcakes - Retro Recipe Day 5

I haven't had Lemon Meringue Pie for years. I distinctly remember the flavour like it was yesterday though, as I am sure many people can. I simply had to make it for retro week. However, The Bloke and I would never get through a whole pie so I had to downsize. And bring it up to date. So here we have my Lemon Meringue Cupcakes.

You can easily buy lemon curd in a jar. It makes this recipe take no time at all. But I have also added the recipe for homemade lemon curd too, as its just a nice thing to make yourself if you have the time.

Lemon Meringue Cupcakes

For the meringue:

Whisk together two egg white until stiff peak stage and slowly add 100g sugar in 3-4 stages, continuously whisking until glossy. Set to one side while you make the cupcakes.

For the cupcakes:

100g butter
100g caster sugar
100g self raising flour
2 eggs
1 tsp. vanilla essence
zest of 1 lemon

Cream together the butter and caster sugar until light and incorporated. Mix in the first egg and then the second whisking well. Whisk in the vanilla essence and lemon zest and fold in the flour. Note: This is a basic cupcake mix (excluding the lemon zest) that you can make with any added flavour or topping.

Fill the paper cases about two thirds up and cook at 180 C for 10 minutes.

Pipe the meringue on top of the cupcake and put back in the oven for a further 10 minutes, until browned on top.

There are two ways to incorporate the lemon curd. One is to put a teaspoon in the middle of the cupcake batter. You add a couple of teaspoons of the batter into the paper cake, then a teaspoon of lemon curd, topped with another couple of teaspoons of batter. Then cook for 20 minutes before topping with meringue and using the grill to brown the meringue. But personally, this way I find the curd gets a bit lost.

The way I did it was when the meringue topped cakes came out of the oven after its second 10 minutes, I let them cool for an hour, and simply lifted off the meringue top (it comes away easily). Added the curd to the top of the cupcake and put the meringue back on top. This way you are guaranteed a generous amount of the lemon curd!


The recipe for the lemon curd is:

175g sugar
110g butter, cubed
2 eggs
juice from 2 lemons

Put the ingredients into a heatproof bowl and set over a pan of simmering water. Keep whisking until it thickens. It takes about 20 minutes so have faith. When its thicker, put into a sterilised jar ready for use. You can use any leftover curd to put on toast. Delicious!

Jerk Chicken & Calaloo Stuffed Rolls & Pork Beanos

Now this may look like I am veering off Retro Week, but I assure you I'm not so please bear with me! When I was a little girl back in the 70's, my mother used to make what she called 'Beanos'. I don't know if this was a name she made up or a recipe she came up with but it was simply baked beans in pastry - which looked a bit like a Cornish pasty. I loved them so had a go at making them the other day. I wasn't impressed. The pastry was just.. too much really and it was lacking something. I guess my taste has changed over the years. But it got me thinking of another story.

When I was in my twenties, I went to lunch with the receptionist one day. She was a lovely girl called Yvette whose roots were in Jamaica. She took me to a Caribbean bakery and she had a hot roll filled with salt fish (Ackee). I was a vegetarian in those days so opted for the Calaloo version (Calaloo is a Jamaican vegetable, similar to spinach/greens). It was delicious.

With both of these stories in mind I made these. First batch are ciabatta rolls filled with Jerk Chicken and Calaloo and the second batch are filled with tiny pork meatballs and beans. Lets start with the chicken ones.


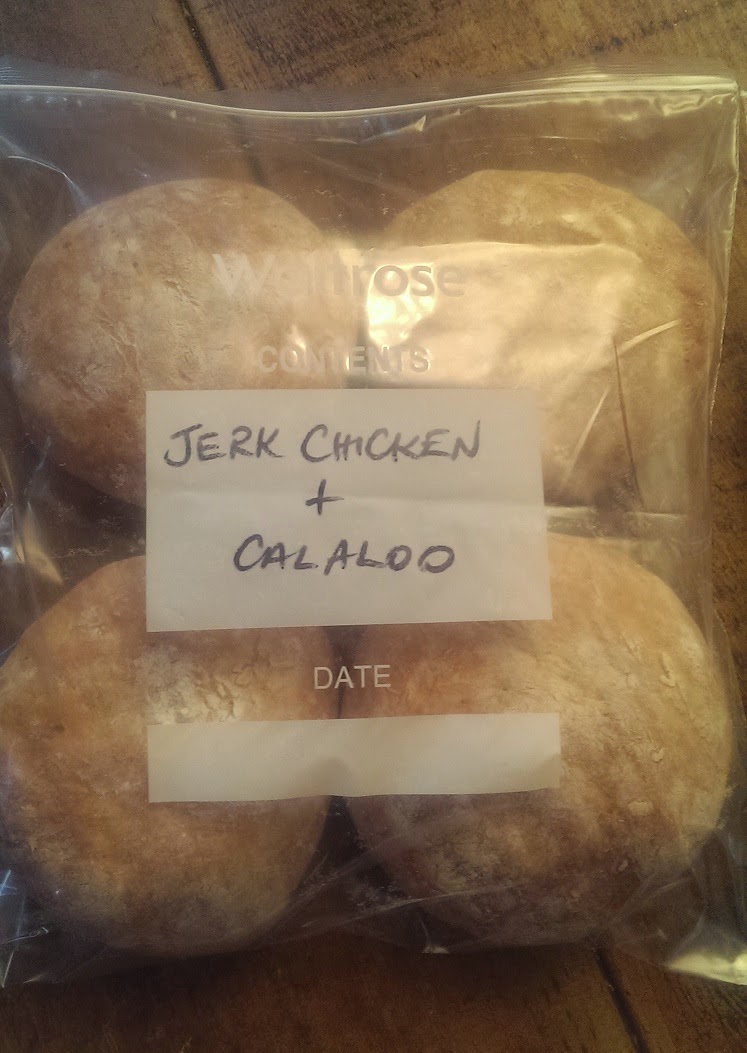
For these I used a ciabatta bread mix which I have talked about it the past. Its quick and handy (pic at the bottom of this page). The pack I bought made eight large rolls. You make the dough to packet instructions - add water and a splash of olive oil - and have your fillings ready. Cut the dough in half (half for chicken, half for pork & beans).

You simply then just get the dough half and cut it into 4 equal pieces. Press out into a round of about 5-6 inches and fill the centre of the dough with one of the fillings. Pull up the sides and press to seal, using a little water if needed. Put onto a floured baking sheet, seam side down and complete the others. Then take the other half of dough, cut into four again and stuff with the other filling. Put onto a separate floured baking sheet. Leave them all for 15 minutes to rise.

For the Jerk Chicken & Calaloo

I marinated two small skinless chicken breasts in my jerk marinade, which I always have in my fridge (recipe here), for an hour and then baked, covered, in a 200 C oven for 20 minutes. Then I shredded the meat and put into a bowl. I chopped an onion and fried it gently in one tsp. of oil and when cooked added that to the chicken. Then I added 4-5 tablespoons of Calaloo (picture of the tin at the bottom of this page) and stirred together.

For the Pork & Beans

I seasoned about 200g pork mince with salt, pepper and garlic powder and made into one inch balls. Then fried in a little oil until browned and added to 400g tin of baked beans. 

 
The great thing about these rolls is that they can be eaten hot (microwave for 1 minute) or cold. You can bag them up and take to work for lunch, or take them on a picnic with the comfort of no spillages like you would with normal sandwiches!


I got a text from The Bloke at lunchtime today...a very happy man. He LOVED them both.

Here is the Calaloo - you can get it in most stores. And a picture of the bread mix. Happy baking!


Wednesday, 15 April 2015

Rustic Chicken Keiv - Retro Recipe Day 4

So here we still are with Retro Week and I'm noticing that the things I want to cook from back in the 70's and 80', are often ones that have stuck around and are still eaten today. The main reason for that is, I believe that food has got better in general. Some of the recipes I could cook are unhealthy and full of cheese, pastry, eggs and even more cheese.

So I ignored the steak and kidney pudding (I can't bear suet), the chicken cordon bleu and the vol-au-vents. The jam roly poly (suet again) and the eggs mornay. And stuck with the classic Chicken Kiev. This one was cooked on the bone and coated in large crisp Panko breadcrumbs,and baked - not fried!


Now I won't lie and say making this is the easiest thing in the world. The reason for this - and this stresses out some top chefs too - is to ensure the garlic butter doesn't leak out before you serve it. There are many ways to get this right. Some chefs believe that its best to make the garlic butter and freeze it before shallow frying. Some use cocktail sticks. Some make the whole thing and freeze it before cooking. Some use the mini fillet you find inside the chicken breast to enclose it. You don't always get the mini fillet with a cheaper multi buy chicken breasts, so its probably best to buy as a pack of two on the bone, or purchase from the local butcher. This is the way I have done it.

Ingredients:

2 chicken breasts, on the bone, skin removed.
25g butter, softened
2 tbsp. parsley, chopped
2 cloves garlic, minced
flour for dusting
3 eggs
pack of panko breadcrumbs

Method:

Mash the garlic and parsley into the softened butter until incorporated. Set to one side on the counter. Remove the mini fillet from inside the chicken breast and lay between two pieces of cling film. Using the bottom of a pan, bash the mini fillet to thin it out. Set aside till needed. Make a pocket in the chicken breast, being careful not to cut all the way through. Put about a teaspoon of the garlic butter in the pocket and close gently. Cover the cut with the thin slice of mini fillet and gently press to attach. Repeat with the other chicken breast.

Dust both kievs with flour and gently lower in the beaten eggs, and then the breadcrumbs. Dip again carefully in the egg and then the breadcrumbs to give a thick coating. Place in a baking dish and chill for a few hours to set.

Set the oven to 190 C and bake the keivs for about 40 minutes or until golden and cooked through.
Serve with a wedge of lemon, with chips and green beans or peas. The joy (relief!) you feel when you cut open the cooked kiev and the butter oozes out is unmeasureable!

Tuesday, 14 April 2015

A 1970's Buffet as a Main Course - Retro Week Day 3

Making all this food was so nostalgic. The funny thing is that some of these dishes last the test of time. Quiche Lorraine, Devilled Eggs, Prawn Cocktail and Scotch Eggs were buffet dinner party classics! We had this last night which was perfect as it was sunny in the garden until late. In fact it was the hottest day of this year so far and I had spent half of the day cooking and half of the day gardening - getting all the seedling in for the year.

After 4 hours of gardening, all I wanted was a shower and a dinner all ready for me. And it was - I had pre cooked it earlier. My 1970's buffet!


The Scotch Eggs are actually quails eggs (as are the devilled eggs), as I wanted them small. And the usual sausage meat stuffing around the eggs is Irish White Pudding, which I mixed with a little chopped bacon, finely chopped onion, both cooked, and fresh chopped parsley. Then they were dunked in egg and breadcrumbs and then baked to keep them low fat. I don't see the need to deep fry things when they can be baked. (the full recipe you will find on my website here).

 
For the quails eggs, half the hard boiled eggs and mix the cooked yolk with a teaspoon of Dijon mustard, 1/4 tsp. of cayenne pepper, one finely chopped cornichon and a little mayonnaise. Pop it into the cases and sprinkle with more cayenne pepper.

The Quiche Lorraine was kept simple - pastry case baked blind and left to cool. Chopped bacon and onion added to the case along a couple of handfuls of grated cheddar. Topped with 4 eggs whisked with 250ml single cream and some chopped parsley. Popped in the oven for 25-30 minutes at 170 C, you have the perfect quiche Lorraine.


The Prawn Cocktail was the easiest. I sautéed king prawns in butter, garlic and chilli flakes and set them aside until plating up. The Rose Marie sauce is just mayonnaise, tomato ketchup, cayenne pepper and tabasco sauce.


The credit for the plating up goes to The Bloke - who has seen me plate up so many times now he is an expert! All made earlier... I just had to put my feet up and enjoy with a little bread and butter (so 1970's) and a glass of wine. It was a Sauvignon Blanc though...you didn't expect me to have Blue Nun did you??!

Monday, 13 April 2015

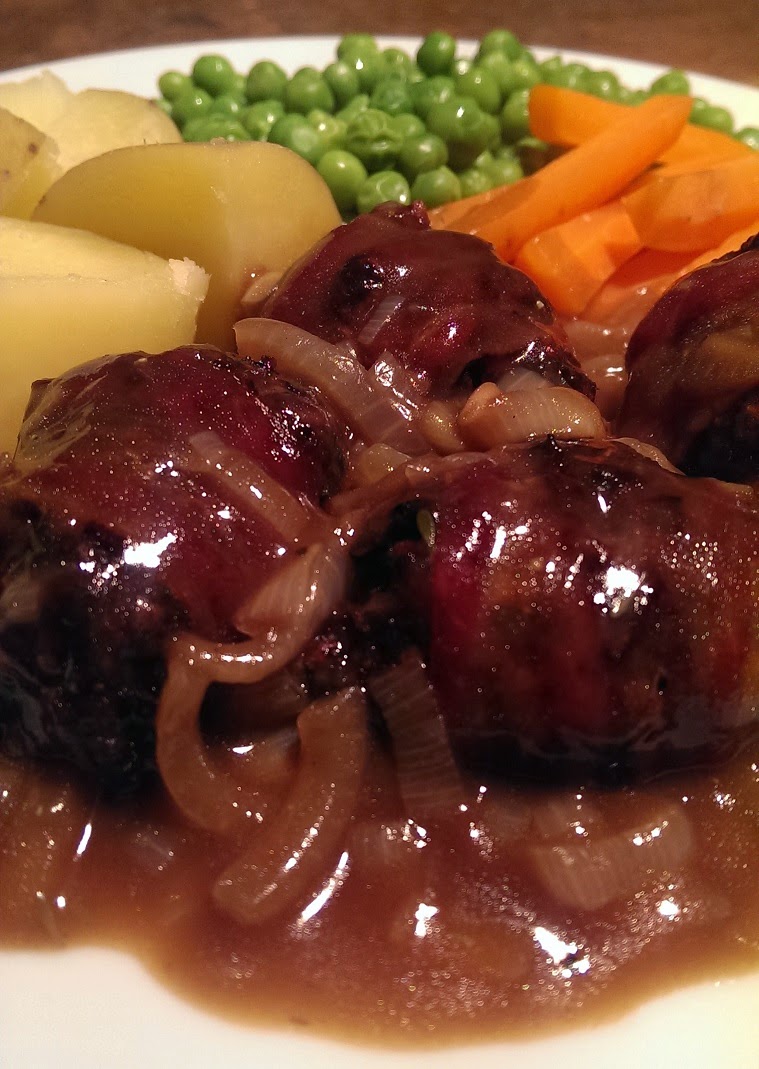
Faggots - Retro Recipe Day 2

Yes you heard me, faggots. You all remember these right? Well the original recipe has a fair bit of offal in it so I have made them slightly differently (no heart,just some liver) as offal is not so popular these days. They have a taste of their own and are just lovely.

They are so very British and were cooked as a cheap food, but I think its time for a revival.


Ingredients:     (Makes about 14)

110g pork shoulder, chopped
110g pigs liver, chopped
250g pork belly, chopped
80g breadcrumbs
1 small onion, finely chopped
2 tbsp. parsley (fresh or dried)
1 tsp. thyme
salt & pepper
7-8 strips of streaky bacon

Method:

Put the meats into a food processor and blend until well chopped and combined. Put into a bowl and add the breadcrumbs, herbs, seasoning and mix well. Put into a container and chill in the refrigerator for half an hour.

Stretch each piece of bacon with the back of a knife on a chopping board to thin and lengthen a bit and cut in half. Make a ball of the faggot mix (just under 2 inches) and roll a piece of the bacon around it. Put onto a baking tray and complete the remainder.

Set the oven at 170 C and cook for 40 minutes. Serve with boiled potatoes and homemade onion gravy (recipe here).


You'll be surprised how good they are. Similar to standard meatballs but with OH so much flavour. Retro food at its best!

Rhubarb & Custard Cream Biscuits

During this retro week of cooking I wanted to make some biscuits that make me think of my childhood. And two stood out to me. Custard creams and garibaldi. I loved them both although I don't eat that many biscuits these days.

The rhubarb in the garden is doing particularly well already this year, so I went out and cropped a handful...thinking how nice rhubarb and custard creams would be..


Ingredients:

500g rhubarb, cut into inch pieces
1 tbsp. honey
2 tbsp. sugar
splash of water
220g plain flour
60g custard powder
30g icing sugar
180g butter, cold and cubed
1/4 tsp. vanilla essence
60g butter
225g icing sugar
3 tbsp. custard powder
5-6 tbsp. stewed rhubarb
1/4 tsp. red food colouring (unless your rhubarb is particularly vibrant!)

Method:

Put the rhubarb in a small pan with a splash of water, the honey and sugar. Cook for about 20 minutes to break down and cook the fruit. Turn off heat and leave to cool.

In a mixing bowl put the flour, icing sugar, custard powder and vanilla essence. Rub in the butter with your fingers. It will seem crumbly but keep going until fine breadcrumb texture. Press together to form a dough and wrap in cling film. Chill for 30 minutes.

Roll out the dough in between two sheets of cling film to a height of about 3mm and use a cookie cutter to make rounds (about 2 inch.) Pull together the dough scraps, re roll and re cut. Prick with a fork and put on a baking sheet covered with baking paper. Chill again in the fridge for 15 minutes. Cook at 180 C for 10 minutes until lightly golden. Remove and leave to cool. You should have about 24 biscuits.

For the filling, use a hand blender to whip the butter until light. Add the icing sugar and custard powder a little at a time until half used. Then add the rhubarb and whisk further. Then add the remaining icing sugar and custard powder to have a smooth creamy filling. Add a tiny bit of red food colouring if needed. You will probably have a bit too much of the buttercream, but it freezes really well!

Use a piping bag to fill the centre of half of the upturned biscuits and top with another half. Chill in the fridge for 10 minutes. Then enjoy with a cup of tea in the garden!


To anyone who may be curious about the cookies in the background of the photo above - that is the second batch of oat, raisin & hazelnut cookies that I made last week (I froze half the dough). Only after cooking them, I drizzled with white chocolate. Even better!
 

Sunday, 12 April 2015

Steak Diane - Retro Recipe Day 1

Well I promised retro food and the first one had to be the classic Steak Diane. This is originally from the USA and was very popular at English dinner parties and restaurants everywhere in the 1960's and 1970's. By 1980 it was considered to be rather dated - but I know many people who still cook it. And that is because its gorgeous.


Its simply just a steak which you pound until its thin, so it cooks fast. You then make the sauce quickly in the pan juices. Back in the day they would flambĂ© the brandy at the table, but I just did it on the stove top.

Ingredients:

2 sirloin steaks
1/2 cup beef stock (cube is fine)
2 tsp. tomato paste
2 tsp. Dijon mustard
4 tsp. Worcestershire sauce
2 tbsp. butter
1 shallot, chopped
4 tbsp. brandy
1/3 cup double cream

Pound the steaks until fairly thin. In a jug, whisk together the stock, tomato paste, mustard and Worcestershire sauce. Fry the steaks in the butter until cooked how you like it (I went for one minute so it was rare)and remove from the pan. Cover with kitchen foil to rest while you make the sauce.

Add the shallot to the same pan and fry quickly. Add the brandy and set it alight (carefully!). When the flame subsides, let the brandy cook until mostly evaporated (it'll take just a minute or two). Add the stock mix from the jug and cook for a couple of minutes, stirring as it thickens. Add the cream and cook for 2 more minutes. The sauce is ready and the steaks will be rested.

Serve the steak with the sauce poured over the top. I also served this with hand-cut baked chips and peas. Really, really tasty!


Saturday, 11 April 2015

Irish Spiced Beef

This is an Irish recipe which I believe hails from County Cork, but is a cured beef that is sliced thinly and eaten with brown bread and butter and chutney at Christmas time.

I tried this because we get through a fair bit of cooked sandwich meat which is relatively expensive and doesn't last for long once opened. This mini 500g beef joint I bought was only £5.50 and its lasting for ages. You can just cook it as it is, of course, but this way it is cured and tastes more like pastrami. After curing it lasts for about 3-4 weeks in the fridge. The only odd ingredient involved is saltpetre which is actually sodium nitrate (£3.49 Amazon for loads) and is used to cure meats.


Ingredients:

500g mini beef joint
20g soft dark brown sugar
1 tbsp. allspice berries
1 tbsp. juniper berries
1 tsp. cloves
1/2 tsp. nutmeg
1 tsp. saltpetre
1 tbsp. sea salt

Method:

Trim off any excess fat on the meat and rub in the sugar. Put it in a covered bowl in the fridge for 12 hours.

Grind together all the spices and salt. Rub all over the meat, cover and return to the fridge for 6-7 days, turning daily.

After 7 days, put it in a sauce pan and cover with water. Bring to the boil, turn down the heat and summer for 1 hour. Leave to cool and then slice.

I like this in a sandwich with mayonnaise, mustard and cornichons. Delicious. Not only does it keep for 3-4 weeks but you know what's in it - unlike pre-packed meats!


Thursday, 9 April 2015

Pork stuffed with Irish White Pudding & Bacon

Last weekend when I returned back from Ireland, the only food product I brought back with me was a few packs of white pudding. You can buy it in all supermarkets in England, but I like to bring it home.

Its similar to black pudding and contains pork meat and fat, suet, bread and oatmeal formed into a large sausage and is usually eaten sliced and fried with a hot breakfast. Or an 'Irish Fry' as they fondly call it.

I wanted to do something else with it so have used it as a stuffing to go into a pork tenderloin. And how delicious it was!


Ingredients:

1 pork tenderloin
1 tbsp. oil
1 clove garlic, chopped finely
1/2 onion, chopped finely
4 rashers streaky bacon
2 handfuls breadcrumbs
small bunch parsley, chopped
approx. 80ml double cream, to bind
1/2 pint red wine
1 tsp. Dijon mustard
drizzle of runny honey

Set the oven to 180 C. Trim any excess fat off the pork tenderloin and cut down the middle 2/3 of the way through to create a large pocket for the stuffing. Set to one side.

Fry the onion, bacon and garlic in a frying pan until beginning to brown. Leave to cool for 5 minutes and then put into a bowl with the white pudding, parsley and breadcrumbs. Mix thoroughly and use the cream to bind it a little. Put the stuffing into the pocket in the pork and pull up the sides to the filling is encased. Secure with string in 4 about 4 places.

Put the pork into a roasting tray with the cut side up.Smear with the mustard and drizzle honey over the cut part. Pour the wine into the base of the roasting tin and cover with tin foil. Roast for 30 minutes, covered. Then remove the foil and cook for a further 15 minutes. You may need to top up the wine a little to stop it evaporating completely. Remove from oven and leave to rest for 2 minutes before slicing.

For the gravy:
I chopped 1 shallot and fried with 1 tbsp. butter. When cooked, add 1 tbsp. flour and cook, stirring for 1 minute. Add a little chicken stock and a little of the cooking liquor to make the gravy to the consistency you like.


I served this with the last of the season brussel sprouts, shredded which I sautéed with some par boiled new potatoes. Delicious!

Now I need to come up with something else to do with the white pudding!